Now I'm of the opinion that I want things automated, this way if I need to redeploy, I do not have to think about it, I can just push my project and have my infrastructure created as needed, this also helps for setting up multiple environments such as dev, test, preprod, and prod, and of course if you want to create a temporary environment to test out an idea, it becomes very simple if you have your Infrastructure Provisioning script.
In this post we won't create that script but we will set the stage for it.
To get started login to your Azure Portal: https://portal.azure.com this is not where your project is located, but where it will be deployed to. If you do not have an account, you should set one up.
We only really did that to ensure that you have an Azure Portal account set up.
Go back to your Azure Devops Portal https://dev.azure.com/, this is where your project is hosted.
Now we are going to configure part of our Continuous Integration Pipe line, or the "CI" in "CICD", we are going to configure a Powershell script that will run when we push our code to in this case our master branch which will connect to azure and configure all the resources we are going to need to host our Images in a Azure Blob storage with a CDN configured.
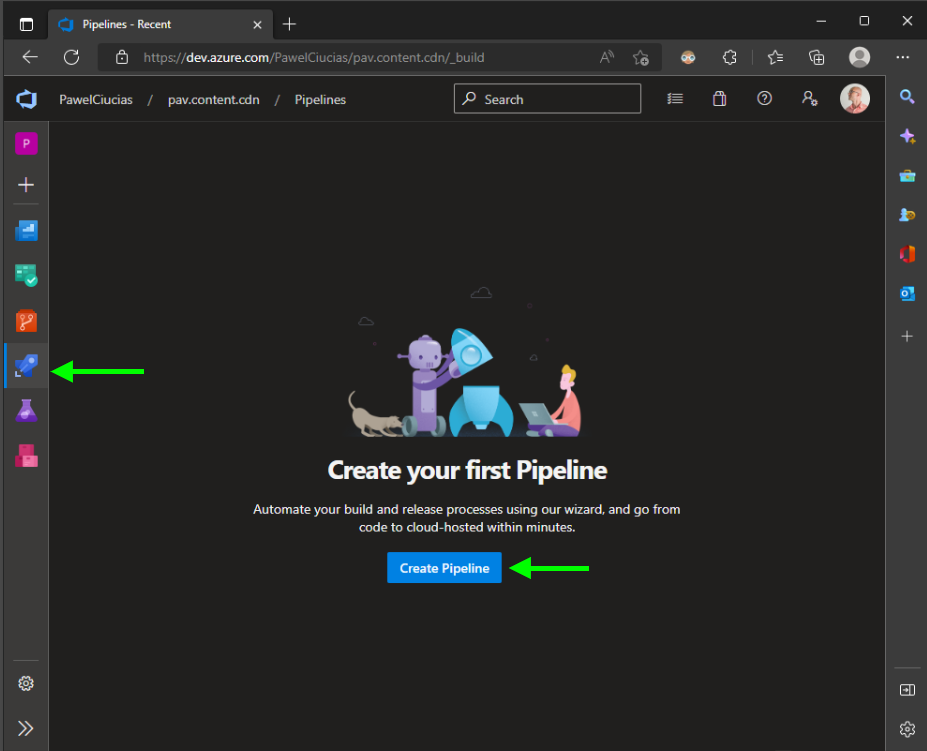
To get started click the rocket ship on the left hand side.
Next click the "Create Pipeline" button.
From here we are going to select that we want to trigger our pipeline from our "Azure Repo Git" the one we pushed in the previous post.
Next we are going to select our Repo, this project could have potentially multiple repos, one for a SPA, one for an API, one for Content, etc, right now we just have one, so choose it below
next we are going to choose a minimal started pipeline YAML file, this will get us st
this will create a simple starter YAML file which we will customize for our Continuous Integration pipeline.
The first thing I like to do is configure is set up a variables section at the top of my YAML file, this is where I will have all of my inputs in one place, then as my first step I like to print them out so that I can inspect them.
# Starter pipeline
# Start with a minimal pipeline that you can customize to build and deploy your code.
# Add steps that build, run tests, deploy, and more:
# https://aka.ms/yaml
trigger:
- dev
- test
- master
variables:
${{ if startsWith(variables['Build.SourceBranch'], 'refs/heads/') }}:
branchName: $[ replace(variables['Build.SourceBranch'], 'refs/heads/', '') ]
${{ if startsWith(variables['Build.SourceBranch'], 'refs/pull/') }}:
branchName: $[ replace(variables['System.PullRequest.TargetBranch'], 'refs/heads/', '') ]
name: 'pav'
location: 'westeurope'
azureSubscription: 'Pav (39537a7e-0000-0000-0000-f75e4bdb46c3)'
pool:
vmImage: ubuntu-latest
steps:
- script: |
echo BranchName = '$(branchName)'
echo name = '$(name)'
echo location = '$(location)'
echo azureSubscription = '$(azureSubscription)'
displayName: 'List YAML variables'
Replace your YAML file with the above, and click the save and run button
Your Azure DevOps Portal, will now ask you to commit the changes to your master branch, just go ahead and do that.
Once you click 'Save and run', you should be redirected to the job screen
Under the Jobs section, click on the job, this will open the running or completed job.
click the List YAML variables step and view your configured variables, super You've now ran your very virst CI pipeline. Now go back to your YAML file and let's switch our runner to windows, we have to do this because Powershell will not execute on Linux which is the default for CI.
with your YAML file vmImage updated to windows- latest, make sure that your cursor is set to the bottom of your YAML file, in the above that would be around line 31.
Next click the Show assistant button in the top right corner, we are now going to add a execute powershell task.
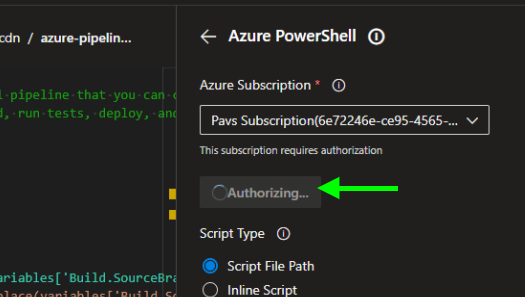
with our task selected, we are going to have to choose our Azure Subscription and authorize it to make changes to our Azure Portal,
Once you click the "Authorize" button, you may be redirected to your Azure Portal to login, however since at the start we already did that, it should spin for a bit then you should be authorized.
Once the process is complete the button should just disappear. for your script path set up:
$(Build.SourcesDirectory)/AzureInfrastructure.ps1'
and for error action preference, just set it to continue for now
if you are wondering, the $(Build.SourcesDirectory) is the variable for the root of your git repo which is where we put our AzureInfrastructure.ps1 file. with that done click the add button.
one thing that you can do now is use your azureSubscirption variable in your Azure powershell task rather than the string that was injected, we may have to use it in multiple places, so it's generally good to have it in one place, rather than multiple ones.
# Starter pipeline
# Start with a minimal pipeline that you can customize to build and deploy your code.
# Add steps that build, run tests, deploy, and more:
# https://aka.ms/yaml
trigger:
- dev
- test
- master
variables:
${{ if startsWith(variables['Build.SourceBranch'], 'refs/heads/') }}:
branchName: $[ replace(variables['Build.SourceBranch'], 'refs/heads/', '') ]
${{ if startsWith(variables['Build.SourceBranch'], 'refs/pull/') }}:
branchName: $[ replace(variables['System.PullRequest.TargetBranch'], 'refs/heads/', '') ]
name: 'pav'
location: 'westeurope'
azureSubscription: 'Pavs Subscription(6e72246e-0000-0000-0000-000000000000)'
pool:
vmImage: 'windows-latest'
steps:
- script: |
echo BranchName = '$(branchName)'
echo name = '$(name)'
echo location = '$(location)'
echo azureSubscription = '$(azureSubscription)'
displayName: 'List YAML variables'
- task: AzurePowerShell@5
inputs:
azureSubscription: '$(azureSubscription)'
ScriptType: 'FilePath'
ScriptPath: '$(Build.SourcesDirectory)/AzureInfrastructure.ps1'
errorActionPreference: 'continue'
FailOnStandardError: true
azurePowerShellVersion: 'LatestVersion'
with that done we can click the save button as before and commit our changes to our master branch.
once your changes are committed go back to your project on your desktop and in your terminal type
git pull, to pull the YAML file down to your local repo.
above you can see where we pulled our project, and now that we have an azure-pipelines.yml file in our local project. next we will set up our powershell script to provision our infrastructure.


