Showing posts with label Infopath. Show all posts

Tuesday, 16 July 2013

Deploy a form library via WSP

So you've created an InfoPath form, and now you want to deploy it to a library, but your SharePoint admin will light you on fire should you dare connect to production through InfoPath. So the question is; how do we deploy our InfoPath form declaratively via visual studio? Well let’s start by making a simple InfoPath form. 
With your simple form ready, make sure to set the permission on the form to domain, and  promote the properties through the advanced form option.  Once your form is configured publish it to a network location, when that’s complete open up visual studio and create a content type that inherits from the form base type. It should look something like:

<?xml version="1.0" encoding="utf-8"?>
<Elements xmlns="http://schemas.microsoft.com/sharepoint/">
  <!-- Parent ContentType: Form (0x010101) -->
  <ContentType ID="0x010101004663c851f85b42f59d84e3bf2359a33f"
               Name="SimpleForm_CT"
               Group="Custom Content Types"
               Description="My Content Type"
               Inherits="TRUE"
               Version="0">
    <FieldRefs>
    </FieldRefs>
  </ContentType>
</Elements>

That’s what the Declarative xml for the content type should look like, now what we are going to do is bring our published form into our content type and deploy it using a module. 

Now with your published form added select the properties and ensure that:
  • The Deployment type is set to element file
  • The Deployment path is set to the root of the content type.


Notice how the deployment type property is set to ElementFile and that the deployment location path is cleared out. If you forget to do this your form will not be visible in the Mange form templates page in central admin.


Now with your info path form brought into your content type and the properties set correctly we have to add a module to deploy the InfoPath form, you can either do this in your Content type, or add a completely separate module file. In my opinion since it’s tightly coupled with the content type, I’d keep them together, but what do I know.

<?xml version="1.0" encoding="utf-8"?>
<Elements xmlns="http://schemas.microsoft.com/sharepoint/">
  <!-- Parent ContentType: Form (0x010101) -->
  <ContentType ID="0x010101004663c851f85b42f59d84e3bf2359a33f"
               Name="SimpleForm_CT"
               Group="Custom Content Types"
               Description="My Content Type"
               Inherits="TRUE"
               Version="0"
               RequireClientRenderingOnNew="FALSE">
    <DocumentTemplate TargetName="/FormServerTemplates/SimpleForm.xsn"/>
    <FieldRefs>
    </FieldRefs>
  </ContentType>
  <Module Name="SimpleFormModule" Url="FormServerTemplates" RootWebOnly ="TRUE">
    <File Path="SimpleForm.xsn" Url="SimpleForm.xsn" Type="GhostableInLibrary"/>
  </Module>
</Elements>


Now you've got one more land mine to avoid, open up the feature template that you’re going to use to deploy your InfoPath form.


This is what you’ll see

<?xml version="1.0" encoding="utf-8" ?>
<Feature xmlns="http://schemas.microsoft.com/sharepoint/">
</Feature>

Replace it with
<?xml version="1.0" encoding="utf-8" ?>
<Feature ReceiverClass="Microsoft.Office.InfoPath.Server.Administration.XsnFeatureReceiver"
    ReceiverAssembly="Microsoft.Office.InfoPath.Server, Version=14.0.0.0, Culture=neutral, PublicKeyToken=71e9bce111e9429c"
    xmlns="http://schemas.microsoft.com/sharepoint/">
  <ActivationDependencies>
  <ActivationDependency FeatureId="C88C4FF1-DBF5-4649-AD9F-C6C426EBCBF5" />
  </ActivationDependencies>
</Feature>
If you want a more in depth explanation then just do it.

http://msdn.microsoft.com/en-us/library/microsoft.office.infopath.server.administration.xsnfeaturereceiver.aspx

Now all that’s left to do is create a list definition and instance using your content type


Then enable the management of content types through the advanced library settings.

Monday, 10 June 2013

Rewire Data Connection on activate

Previously we built an InfoPath form that uses data connections to communicate with our web application, and then we converted the data connections into files and deployed them to a data connection library using a module. the only down side is when we open our data connection files to inspect the xml we very quickly notice that we have server specific paths to library's we are posting to, lists we are pulling from, soap services we are using and so on.

<?xml version="1.0" encoding="UTF-8"?>
<?MicrosoftWindowsSharePointServices ContentTypeID="0x010100B4CBD48E029A4ad8B62CB0E41868F2B0"?>
<udc:DataSource MajorVersion="2" MinorVersion="0" xmlns:udc="http://schemas.microsoft.com/office/infopath/2006/udc">
 <udc:Name>submitNewEmployee</udc:Name>
 <udc:Description>Format: UDC V2; Connection Type: SharePointLibrary; Purpose: WriteOnly; Generated by Microsoft InfoPath 2010 on 2013-05-30 at 14:27:52 by SSRAP7\Administrator.</udc:Description>
 <udc:Type MajorVersion="2" MinorVersion="0" Type="SharePointLibrary">
  <udc:SubType MajorVersion="0" MinorVersion="0" Type=""/>
 </udc:Type>
 <udc:ConnectionInfo Purpose="WriteOnly" AltDataSource="">
  <udc:WsdlUrl/>
  <udc:SelectCommand>
   <udc:ListId/>
   <udc:WebUrl/>
   <udc:ConnectionString/>
   <udc:ServiceUrl UseFormsServiceProxy="false"/>
   <udc:SoapAction/>
   <udc:Query/>
  </udc:SelectCommand>
  <udc:UpdateCommand>
   <udc:ServiceUrl UseFormsServiceProxy="false"/>
   <udc:SoapAction/>
   <udc:Submit/>
   <udc:FileName>Specify a filename or formula</udc:FileName>
   <udc:FolderName AllowOverwrite="0">http://server/New Employee/</udc:FolderName>
  </udc:UpdateCommand>
  <!--udc:Authentication><udc:SSO AppId='' CredentialType='' /></udc:Authentication-->
 </udc:ConnectionInfo>
</udc:DataSource>

so what to do about this? well there really is only one thing that I could think of, and that's to create a feature receiver and on the feature activated event:

  • traverse your data connection files
  • open them using the xmldocument class
  • update that server paths
  • save the files
  • check them back into the library

and that's it, you're done. simple right?

first lets traverse the list
public override void FeatureActivated(SPFeatureReceiverProperties properties)
{
    SPSecurity.RunWithElevatedPrivileges(delegate()
    {
        using (SPWeb web = properties.Feature.Parent as SPWeb)
        {  
            SPList dcs = web.Lists["Data Connections"];
            foreach (SPListItem dc in dcs.Items)
            {
                if (dc.Properties["ConnectionType"].Equals("SharePointLibrary"))
                {
                    handleSharePointLibrary(web, dc);
                }
            }
        }
    });
}

this will ensure that we are only looking at data connections that submit to a library, in this next snippet we filter by the data connection name/title to ensure that we are in fact rewiring the one we are concerned with. After we rewire the file we check it back into the library.

private void handleSharePointLibrary(SPWeb web, SPListItem dc)
{
    string listURL = null;
 
    switch (dc.Properties["vti_title"].ToString())
    {
        case "submitNewEmployee":
            SPList lst = web.Lists["New Employee"];
            listURL = string.Format("{0}/{1}/", lst.ParentWeb.Url, lst.RootFolder.Url);
            break;
    }
 
    if (!string.IsNullOrEmpty(listURL))
    {
        SPFile dataConnectionFile = web.GetFile(dc.Url);
        RewireUpdateCommand(dataConnectionFile, listURL);
        dataConnectionFile.Approve("Approved via event reciever");
    }
}

Now for the magical part, in the above snippet you see a call to the RewireUpdateCommand function, lets take a look inside that sucker.

private void RewireUpdateCommand(SPFile dataConnectionFile, string listURL)
{
    string LibraryURL_xPath = "/udc:DataSource/udc:ConnectionInfo/udc:UpdateCommand/udc:FolderName";
 
    XmlDocument doc = new XmlDocument();
    doc.Load(dataConnectionFile.OpenBinaryStream());
 
    XmlNamespaceManager nameSpaceManager = new XmlNamespaceManager(doc.NameTable);
    nameSpaceManager.AddNamespace("udc""http://schemas.microsoft.com/office/infopath/2006/udc");
 
    XmlElement root = doc.DocumentElement;
 
    XmlNode ListId = root.SelectSingleNode(LibraryURL_xPath, nameSpaceManager);
    ListId.InnerText = listURL;
 
    var encoding = new System.Text.ASCIIEncoding();
    dataConnectionFile.SaveBinary(encoding.GetBytes(doc.InnerXml));
}

if you need an explanation xml document msdn

Thursday, 6 June 2013

Deploy Data Connection File Via Feature

In our previous post we created an InfoPath form with two data connection files, we did this to separate our form from our server instance. We do this to attain a one step deployment process, that is we want our WSP package to deploy everything, I mean come on connecting to your production environment to deploy an info path form... kinda rookie.

So first off lets create a module to deploy our data connection file, download the one you put into your data connection Library. I'm just going to do the submitNewEmployee.udcx.

In your project add a module, remove the sample.txt file and add your submitNewEmployee.udcx file to the module.

With that complete, open up the elements file for your module, it should look something like this:
<?xml version="1.0" encoding="utf-8"?>
<Elements xmlns="http://schemas.microsoft.com/sharepoint/">
  <Module Name="DataConnectionModule">
  <File Path="DataConnectionModule\submitNewEmployee.udcx" 
        Url="DataConnectionModule/submitNewEmployee.udcx" />
</Module>
</Elements>
We're going to make a couple changes to it:

  • Add the URL and Path to the module
  • Remove the Path from the file
  • Simplify the URL for the file, you specify it in the Module "Lists/DataConnections"
  • Add the Type and ignore properties to the file
  • Add a property node to the file

<?xml version="1.0" encoding="utf-8"?>
<Elements xmlns="http://schemas.microsoft.com/sharepoint/">
  <Module Name="DataConnectionModule" Url="Lists/DataConnections" Path="DataConnectionModule">
    <File Url="submitNewEmployee.udcx" Type="GhostableInLibrary" IgnoreIfAlreadyExists="TRUE">
      <Property Name="Title" Value="submitNewEmployee" />
    </File>
  </Module>
</Elements>
changes are highlighted in yellow.

Make sure, that your module is in the feature manifest, the right hand column.

After you deploy your project open up your data connection library to verify that your file was deployed. check the modified date to insure that you're looking at the most latest version and not just the one you uploaded from InfoPath.

now go ahead and download your submitNewEmployee.udcx file, open it up and take a look inside. the one thing that should stick out and burn your eyes is highlighted.
<?xml version="1.0"?>
<?MicrosoftWindowsSharePointServices 
ContentTypeID="0x010100B4CBD48E029A4AD8B62CB0E41868F2B0004AFDC87700F120458D1316B308B71A11"?>
<udc:DataSource MajorVersion="2" MinorVersion="0" xmlns:udc="http://schemas.microsoft.com/office/infopath/2006/udc">
  <udc:Name>submitNewEmployee</udc:Name>
  <udc:Description>Format: UDC V2; Connection Type: SharePointLibrary; Purpose: WriteOnly; Generated by Microsoft InfoPath 2010 on 2013-05-30 at 14:27:52 by yoursite\Administrator.</udc:Description>
  <udc:Type MajorVersion="2" MinorVersion="0" Type="SharePointLibrary">
    <udc:SubType MajorVersion="0" MinorVersion="0" Type=""/>
  </udc:Type>
  <udc:ConnectionInfo Purpose="WriteOnly" AltDataSource="">
    <udc:WsdlUrl/>
    <udc:SelectCommand>
      <udc:ListId/>
      <udc:WebUrl/>
      <udc:ConnectionString/>
      <udc:ServiceUrl UseFormsServiceProxy="false"/>
      <udc:SoapAction/>
      <udc:Query/>
    </udc:SelectCommand>
    <udc:UpdateCommand>
      <udc:ServiceUrl UseFormsServiceProxy="false"/>
      <udc:SoapAction/>
      <udc:Submit/>
      <udc:FileName>Specify a filename or formula</udc:FileName>
      <udc:FolderName AllowOverwrite="0">http://yoursite/New Employee/</udc:FolderName>
    </udc:UpdateCommand>
    <!--udc:Authentication><udc:SSO AppId='' CredentialType='' /></udc:Authentication-->
  </udc:ConnectionInfo>
</udc:DataSource>
Now that does not seem very dynamic, and that's because it's not, what we are going to have to do is in our event receiver open this file up, update the url and save it up again. I'll tackle that in my next post.

Continued

Wednesday, 5 June 2013

InfoPath Data Connections

In this post We're going to create a InfoPath form that reads job titles from a SharePoint list and submits itself to a SharePoint Forms Library, but we are going to store our Data Connection in a SharePoint Data Connection Library. We have Three prerequisites for this:


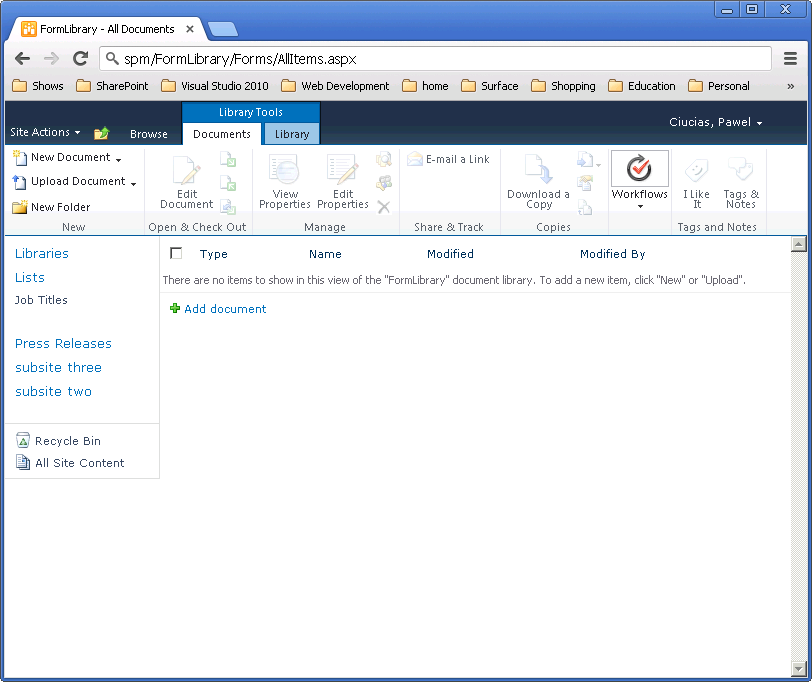
What do I mean that our forms library is only going to be a place holder? in InfoPath to create a Submit to Library Data Connection you actually need to have this document library on your site. For now just make a Document Library through the SharePoint UI and call it FormLibrary, in a subsequent post I'll demonstrate how to deploy the Form we are making here via a WSP package.

Make Note of the forms URL, http://spm/FormLibrary
With the above three complete, open up InfoPath and create the following form.

With your form complete it's time to make your data connections, Go to the Data Connection Tab and click the Data Connections button.

This will bring up the Data Connections Window, it looks like this

What you're going to do is click the add button, the first thing we're going to do is specify that we want to retrieve data.

Next we are going to specify that we're going to retrieve our data from a SharePoint Library or list, in our case it'll be that Job Titles list we made previously.

Next select the site where the list you wish to pull data form resides.

Pick the columns you need in your form and the order you want them sorted. In our case we are going to need the Title Column and we should sort it in ascending order.

In the next window we can choose to store a copy of the data in our form, I leave this unchecked because I'll be using a web based form. If you utilize infopath filler then you might want to check this off... i guess...

Now give your data connection a unique name, I generally like to use camel case

When you click finish you'll be brought back to the data connection window, with your new data connection listed what we are going to do is select our getJobTitles Data connection and convert it into a Data connection file, at this point if you don't have a Data Connection Library this will not work.

Next you're going to specify the location of your Data connection library and append it with the file name you want the data connection to have. Hit OK and you're Job titles Connection file is created.

Now you should be back at your Data connection window, if you want you could open your data connection library in your browser to inspect the file you just created.
Next let's run through that entire process again, but this time let's build a data connection for the form submit. Back at the Data Connections window click the add button one more time.
Again you'll be asked whether you want to submit or receive data, this time pick submit.
next pick "To a document library on a SharePoint site"
Give your Data Connection a name
Click finish, you should go back to the Data Connections window, select your newly made data connection and convert it to a data connection file as well.
Just Like before specify your data connection library url and append it with the file name you want your data connection to have.

again go to your Data Connection library in your browser to see the newly added data connection file.
Now save both data connection files to your hard drive, we are going to move them into our projects, also publish your form to the same network location, we’re also going to deploy that using our visual studio solution.
And that’s it you've created your form and two Data Connections, One to Submit your form to a library and one to Fetch job types from a SharePoint list.

Continued