XSTL can replace most web parts; if your web part renders list items odds are you probably should have used an XSLT transformation, but instead you made a foreach loop and rendered it on screen, which is greate until you need to implement a "No Code" Solution. I double quote that because by no code we just mean front end code, so basically a lot of XSLT, CSS and JavaScript. To get started let's create a content type through SharePoint Designer.
In the above I created a Picture library and added some custom columns:
- Hex Code
- Parent Id
- Grid Location
Now the only column we'll use for this walk through will be the HexCode, the other two are actually for a different transformation. One of the key benefits of using xslt transformations over web parts is the trust level, since all your transformation is doing is just making your list look different on the client side, it will never mess up your farm which is why you probably have the restriction of a "NO CODE" solution in the first place.
once we have our content type create, lets instantiate a list with this content type, you can accomplish this through the webUI in the list settings. Once that's done add the list to a web part zone,
with your list added you should see something like this
not very exciting, but we'll change that soon enough; now what we are actually looking at is an XSLT, and a very complicated one created by Microsoft, ours is going to be much simpler, but before we make it lets take a look at the raw XML that sits behind this. To accomplish that we need to create a simple xslt to strip everything out; you could bing it, but hell just use the one below.
<?xml version="1.0" encoding="UTF-8"?>
<xsl:stylesheet version="1.0" xmlns:xsl="http://www.w3.org/1999/XSL/Transform">
<xsl:output method="xml" version="1.0" encoding="UTF-8" indent="yes"/>
<xsl:template match="/">
<xmp>
<xsl:copy-of select="*"/>
</xmp>
</xsl:template>
</xsl:stylesheet>
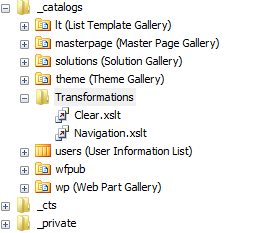
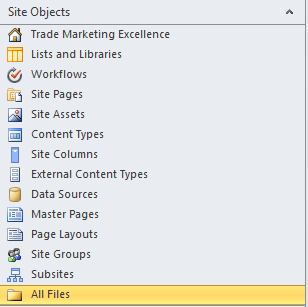
The question is where the hell do i put this? and being a consultant I'll give you the Out-of-the-Box response "We'll that depends" (smug look on my face)... seriously though it depends on your users, do you want just anyone to be able to open it up? in that case toss it into a Transformations library much like you would with CSS or JavaScript, but if you want to obstruct it a little bit create a Transformations folder in you _catalogs folder through SharePoint Designer.
with that complete go back to your webpart and hit edit, then under the Miscellaneous category fill in the following for the XSL Link: /_catalogs/Transformations/Clear.xslt as shown below.
now once you hit ok or apply this will strip out the standard xslt to expose the raw xml data behind it.
not very interesting but at least you get the point, we're just dealing with xml that's transformed to look like something else.
So let's talk a little about XSLT, firstly
here is a great explanation of what it is. Now my one line description is: xslt is an instruction set to transform xml into something else, usually html.
so lets get started, first we'll set up our xslt stylesheet
<?xml version="1.0" encoding="UTF-8"?>
<xsl:stylesheet version="1.0" xmlns:xsl="http://www.w3.org/1999/XSL/Transform" xmlns:ddwrt2="urn:frontpage:internal">
<xsl:template match="/" xmlns:x="http://www.w3.org/2001/XMLSchema" xmlns:ddwrt="http://schemas.microsoft.com/WebParts/v2/DataView/runtime">
<xsl:variable name="Rows" select="/dsQueryResponse/Rows/Row" />
</xsl:template>
</xsl:stylesheet>
Think of this as our base starting point, for SharePoint, take a look at the highlighted line, we set that up so that when we iterate over our xml items we can just refer to it with the $Rows variable as show below
<?xml version="1.0" encoding="UTF-8"?>
<xsl:stylesheet version="1.0" xmlns:xsl="http://www.w3.org/1999/XSL/Transform" xmlns:ddwrt2="urn:frontpage:internal">
<xsl:template match="/" xmlns:x="http://www.w3.org/2001/XMLSchema" xmlns:ddwrt="http://schemas.microsoft.com/WebParts/v2/DataView/runtime">
<xsl:variable name="Rows" select="/dsQueryResponse/Rows/Row" />
<html>
<head>
<link rel="stylesheet" type="text/css" href="/Style%20Library/ctp/TopPageNavigation/ctp.TopPageNavigation.css"/>
</head>
<body>
<ul id="ctp-topNav">
<xsl:for-each select="$Rows">
<xsl:call-template name="ListItem" />
</xsl:for-each>
</ul>
</body>
</html>
</xsl:template>
<xsl:template name="ListItem">
<xsl:if test="@ParentId = ''">
<li data-activecolor="{@HexCode}" onmouseout="ctp.TopNav.stripColor(this);" onmouseover="ctp.TopNav.changeColor(this,'{@HexCode}');">
<a href="{@DestinationUrl}">
<span>
<xsl:value-of select="@Title" />
</span>
</a>
</li>
</xsl:if>
</xsl:template>
</xsl:stylesheet>
now the template concept, we'll you can think of it as function of sorts. if this doesn't make too much sense no worries, i'm going to follow this up with much more detailed explanations and examples of xslt.


