Showing posts with label mapi. Show all posts

Monday, 8 January 2024

Docker repo

With our Azurite docker image running, it's time to configure our docker repo. Let's start by adding a docker profile to our 'launchSettings.json' file


"Docker": {
"commandName": "Project",
"dotnetRunMessages": true,
"launchBrowser": true,
"launchUrl": "swagger",
"applicationUrl": "http://localhost:5050",
"environmentVariables": {
"ASPNETCORE_ENVIRONMENT": "Development"
}
},

As I've mention in the past, your naming conventions are very important, they are what let future you figure out what the hell you did; in this case all you're going to have to remember is that you have to check your 'launchSettings.json' file and you'll be able to follow the bread crumb trail of what this profile is meant for.

before we continue we're going to have to add a nuget to our project to work with azureBlobStorage, go to your .csproj file and enter in the following command 

dotnet add package azure.storage.blobs

you should see the following in your terminal

We need to add one more nuget package aht that is the 'azure.Identity' package

Your .csproj should now have the"azure.storage.blobs" package reference added

<Project Sdk="Microsoft.NET.Sdk.Web">
<PropertyGroup>
<TargetFramework>net7.0</TargetFramework>
<Nullable>enable</Nullable>
<ImplicitUsings>enable</ImplicitUsings>
</PropertyGroup>

<ItemGroup>
<PackageReference Include="azure.storage.blobs" Version="12.19.1" />
<PackageReference Include="Swashbuckle.AspNetCore" Version="6.5.0" />
</ItemGroup>

</Project>

these will let us leverage Azures prebuilt classes for interacting with our blob storage.

Before we dive into our DockerRepo class, let's open our app settings file and add our azurite development connection string

{
"flatFileLocation": "DefaultEndpointsProtocol=https;
AccountName=devstoreaccount1;
AccountKey=Eby8vdM02xNOcqFlqUwJPLlmEtlCDXJ1OUzFT50uSRZ6IFsuFq2UVErCz4I6tq/K1SZFPTOtr/KBHBeksoGMGw==;
BlobEndpoint=https://127.0.0.1:10000/devstoreaccount1;"
}

I broke the string up onto multiple lines for ease of reading, however you'll have to concatinate it onto one line.

Now we can finally start coding Next open up your 'DockerRepo.cs' file, it should look like the following


using pav.mapi.example.models;

namespace pav.mapi.example.repos
{
public class DockerRepo : IRepo
{
public Task<IPerson[]> GetPeopleAsync()
{
throw new NotImplementedException();
}

public Task<IPerson> GetPersonAsync(string id)
{
throw new NotImplementedException();
}
}
}

We configured the class but never implemented the methods, Let's take the opportunity to do so now; we're going to create a constructor that takes in a connection string and a the logic for our two get functions.

using System.Text.Json;
using Azure.Storage.Blobs;
using pav.mapi.example.models;

namespace pav.mapi.example.repos
{
public class DockerRepo : IRepo
{
BlobContainerClient _client;
public DockerRepo(string storageUrl)
{
this._client = new BlobContainerClient(storageUrl, "flatfiles");
}

public async Task<IPerson[]> GetPeopleAsync()
{
var openingsBlob = _client.GetBlobClient("people.json");
var openingJSON = (await openingsBlob.DownloadContentAsync()).Value.Content.ToString();

if (openingJSON != null)
{
var opt = new JsonSerializerOptions
{
PropertyNameCaseInsensitive = true
};

return JsonSerializer.Deserialize<Person[]>(openingJSON, opt);
}

throw new Exception();
}

public async Task<IPerson> GetPersonAsync(string id)
{
var ppl = await this.GetPeopleAsync();
if(ppl != null)
return ppl.First(p=> p.Id == id);
throw new KeyNotFoundException();
}
}
}

Now if we take a look at our main

using pav.mapi.example.models;
using pav.mapi.example.repos;

namespace pav.mapi.example
{
public class Program
{
public static void Main(string[] args)
{
var builder = WebApplication.CreateBuilder(args);
var flatFileLocation = builder.Configuration.GetValue<string>("flatFileLocation");

if (String.IsNullOrEmpty(flatFileLocation))
throw new Exception("Flat file location not specified");

if(builder.Environment.EnvironmentName != "Production")
switch (builder.Environment.EnvironmentName)
{
case "Local":
builder.Services.AddScoped<IRepo, LocalRepo>(x => new LocalRepo(flatFileLocation));
goto default;
case "Development":
builder.Services.AddScoped<IRepo, DockerRepo>(x => new DockerRepo(flatFileLocation));
goto default;
default:
builder.Services.AddEndpointsApiExplorer();
builder.Services.AddSwaggerGen();
break;
}

var app = builder.Build();

switch (app.Environment.EnvironmentName)
{
case "Local":
case "Development":
app.UseSwagger();
app.UseSwaggerUI();
break;
}

app.MapGet("/v1/dataSource", () => flatFileLocation);
app.MapGet("/v1/people", async (IRepo repo) => await GetPeopleAsync(repo));
app.MapGet("/v1/person/{personId}", async (IRepo repo, string personId) => await GetPersonAsync(repo, personId));

app.Run();
}

public static async Task<IPerson[]> GetPeopleAsync(IRepo repo)
{
return await repo.GetPeopleAsync();
}

public static async Task<IPerson> GetPersonAsync(IRepo repo, string personId)
{
var people = await GetPeopleAsync(repo);
return people.First(p => p.Id == personId);
}
}
}

we pass our connection string to our Docker repo service in the form our flatfilelocation variable which is populated based on the profile loaded.

Now if we run our application with the 'local' profile our static GetPersonAsync and GetPeopleAsync functions will receive the LocalRepo implementation of our IRepo interface and if we run our application with the 'docker' profile, it will use the DockerRepo implementation of our IRepo interface.

Thursday, 28 December 2023

Dependency injection

I've spoken about the inversion of control pattern before, in essence it is a fundamental design pattern in object oriented languages. It separates the definition of capability from the logic that executes that capability. That may sound a bit strange but what it means is that the class which you interact with defines functions and methods, however the logic which those functions and methods use are defined in a separate class. At run time the class you interact with, either receives or initiates a class which implements the methods and functions needed.

The idea is that you can have multiple implementations for the same methods and then swap out those implementations without modifying your main codebase. There are a number of advantages to writing code this way, one of the primary ones is that this patter facilitates unit testing, however in this post we'll focus on the benefits of having multiple implementations of the same interface.


in the above UML diagram, we define an interface for a repository as well as a person class, we then define two repo classes which would both implement the IRepo interface, finally the Program class would either receive a concrete implementation of the IRepo class or it would receive instructions on which concrete implementation to use. (I've minimised the number of arrows to try and keep the diagram somewhat readable)

Let's try and implement the above in our Minimal API, start by creating the following folder structure with classes and interfaces


It's common to have a separate folder for all interfaces, personally I prefer to have my interfaces closer to their concrete classes, to be honest it really doesn't matter how you do it, what matters is that you are consistent, personally this is the way I like to set up my projects, but there's nothing wrong with doing it differently.

So let's start with the IPerson interface


namespace pav.mapi.example.models
{
public interface IPerson
{
string Id { get; }
string FirstName { get; set; }
string LastName { get; set; }
DateOnly? BirthDate { get; set; }
}
}

as you can see from the namespace, I don't actually separate it from the Person class, the folder is just there as an easy way to group our model interfaces. Next let's implement our Person class


using pav.mapi.example.models;

namespace pav.mapi.example.models
{
public class Person : IPerson
{
public string Id { get; set; } = "";
public string FirstName { get; set; } = "";
public string LastName { get; set; } = "";
public DateOnly? BirthDate { get; set; } = null;

public Person(){}

public Person(string FirstName, string LastName, DateOnly BirthDate) : this()
{
this.Id = Guid.NewGuid().ToString();
this.FirstName = FirstName;
this.LastName = LastName;
this.BirthDate = BirthDate;
}

public int getAge()
{
var today = DateOnly.FromDateTime(DateTime.Now);
var age = today.Year - this.BirthDate.Value.Year;
return this.BirthDate > today.AddYears(-age) ? --age : age;
}

public string getFullName()
{
return $"{this.FirstName} {this.LastName}";
}
}
}

An important thing to call out is, that this is a contrived example, setting the ID property with both a public setter as well as a public getter is not ideal, however I want to focus on the Inversion of control pattern and not get bogged down in the ideal ways of defining properties; I may tackle this in a future post.

Now on to defining our repo interface, simply define two functions, one to get people and one to get a specific person.


using pav.mapi.example.models;

namespace pav.mapi.example.repos
{
public interface IRepo
{
public Task<IPerson> GetPersonAsync(string id);
public Task<IPerson[]> GetPeopleAsync();
}
}

with that done, let's implement our Local repo, it's going to be very simple we are going to use use our path from our local appsettings file to load a JSON file full of people.


using System.Text.Json;
using pav.mapi.example.models;

namespace pav.mapi.example.repos
{
public class LocalRepo : IRepo
{
private string _filePath;
public LocalRepo(string FilePath)
{
this._filePath = FilePath;
}

public async Task<IPerson[]> GetPeopleAsync()
{
var opt = new JsonSerializerOptions
{
PropertyNameCaseInsensitive = true
};

try
{
using (FileStream stream = File.OpenRead(this._filePath))
{
var ppl = await JsonSerializer.DeserializeAsync<Person[]>(stream, opt);
if (ppl != null)
return ppl;

throw new Exception();
}

}
catch (Exception)
{
throw;
}
}

public async Task<IPerson> GetPersonAsync(string id)
{
var people = await this.GetPeopleAsync();
var person = people?.First(p => p.Id == id);
if (person != null)
return person;

throw new KeyNotFoundException($"no person with id {id} exitsts");
}
}
}

Next let's implement our DockerRepo


using pav.mapi.example.models;

namespace pav.mapi.example.repos
{
public class DockerRepo : IRepo
{
public Task<IPerson[]> GetPeopleAsync()
{
throw new NotImplementedException();
}

public Task<IPerson> GetPersonAsync(string id)
{
throw new NotImplementedException();
}
}
}

For now we'll just leave it unimplemented, later on when we set up a docker container, we'll implement our functions.

Finally let's specify which implementation to use based on our loaded profile in our Main


using pav.mapi.example.models;
using pav.mapi.example.repos;

namespace pav.mapi.example
{
public class Program
{
public static void Main(string[] args)
{
var builder = WebApplication.CreateBuilder(args);
var flatFileLocation = builder.Configuration.GetValue<string>("flatFileLocation");

if (String.IsNullOrEmpty(flatFileLocation))
throw new Exception("Flat file location not specified");

if(builder.Environment.EnvironmentName != "Production")
switch (builder.Environment.EnvironmentName)
{
case "Local":
builder.Services.AddScoped<IRepo, LocalRepo>(x => new LocalRepo(flatFileLocation));
goto default;
case "Development":
builder.Services.AddScoped<IRepo, DockerRepo>(x => new DockerRepo());
goto default;
default:
builder.Services.AddEndpointsApiExplorer();
builder.Services.AddSwaggerGen();
break;
}

var app = builder.Build();

switch (app.Environment.EnvironmentName)
{
case "Local":
case "Development":
app.UseSwagger();
app.UseSwaggerUI();
break;
}

app.MapGet("/v1/dataSource", () => flatFileLocation);
app.MapGet("/v1/people", async (IRepo repo) => await GetPeopleAsync(repo));
app.MapGet("/v1/person/{personId}", async (IRepo repo, string personId) => await GetPersonAsync(repo, personId));

app.Run();
}

public static async Task<IPerson[]> GetPeopleAsync(IRepo repo)
{
return await repo.GetPeopleAsync();
}

public static async Task<IPerson> GetPersonAsync(IRepo repo, string personId)
{
var people = await GetPeopleAsync(repo);
return people.First(p => p.Id == personId);
}
}
}

Before we test our code, we first need to setup a flat file somewhere on our hard drive, 


[
{
"id": "1",
"firstName": "Robert",
"lastName": "Smith",
"birthDate": "1984-01-26"
},
{
"id": "2",
"firstName": "Eric",
"lastName": "Johnson",
"birthDate": "1988-08-28"
}
]

I created the above file in the directory "/volumes/dev/people.json",  it's important to know the path because in the next step we are going to add it to our appsettings.Local.json file

{
"flatFileLocation": "/Volumes/dev/people.json"
}

With all that complete let's go into our main terminal and run our api with our local profile

dotnet watch run -lp local --trust

in our Swagger we should see three get endpoints we can call


Each one of these should work

/v1/dataSource should return where our flatfile is located on our local computer

/Volumes/dev/people.json

/v1/people should return the contents of our people.json file

[
  {
    "id": "1",
    "firstName": "Robert",
    "lastName": "Smith",
    "birthDate": "1984-01-26"
  },
  {
    "id": "2",
    "firstName": "Eric",
    "lastName": "Johnson",
    "birthDate": "1988-08-28"
  }
]

/v1/person/{personId} should return the specified person.

 {
    "id": "2",
    "firstName": "Eric",
    "lastName": "Johnson",
    "birthDate": "1988-08-28"
  }

Next if we stop our api (cntrl+c) and restart it with the following command

dotnet watch run -lp http --trust

we again run our application however this time with the development profile, if we navigate to our swagger and call our functions the only one which will work is 

/v1/dataSource which should return the placeholder we specified in our appsettings.Development.json file.

Dev

the other two endpoints should both fail, since we never implemented them 

Tuesday, 26 December 2023

MAPI Swagger

In my previous post we created a very simple empty minimal API project, in this post we are going to add swagger to it. You maybe asking wtf is that? swagger lets you test your end-points without the need of Postman or Insomnia, though neither of those tools is particularly worse or better than the other, and they're very handy for testing production code; But for dev work I find swagger is the best option, because it's the easiest to work with. 

To get start open your 'csproj' file, it's the XML one, it should look like the following


<Project Sdk="Microsoft.NET.Sdk.Web">

<PropertyGroup>
<TargetFramework>net7.0</TargetFramework>
<Nullable>enable</Nullable>
<ImplicitUsings>enable</ImplicitUsings>
</PropertyGroup>

</Project>

in your command prompt enter in:

dotnet add package Swashbuckle.AspNetCore

you should see the following:

Microsoft projects generally use nuget packages for feature installs, you can check out the swashbuckle package at https://www.nuget.org/packages/swashbuckle.aspnetcore.swagger/. Your csproj file should now have a reference to the Swashbuckl.AspNetCore nuget package and look something like the following.


<Project Sdk="Microsoft.NET.Sdk.Web">

<PropertyGroup>
<TargetFramework>net7.0</TargetFramework>
<Nullable>enable</Nullable>
<ImplicitUsings>enable</ImplicitUsings>
</PropertyGroup>

<ItemGroup>
<PackageReference Include="Swashbuckle.AspNetCore" Version="6.5.0" />
</ItemGroup>

</Project>


with that that done we now have to configure swagger in our Program.cs main function, from our previous post we should have something like the following


namespace pav.mapi.example;

public class Program
{
public static void Main(string[] args)
{
var builder = WebApplication.CreateBuilder(args);
var app = builder.Build();

var flatFileLocation = builder.Configuration.GetValue<string>("flatFileLocation");

app.MapGet("/", () => flatFileLocation);

app.Run();
}
}

If your run your application you'll see either "Dev" or "Local" printed out on your screen depending on which profile you load. the thing is that only happens because we mapped the roort url to the value of our appsettings file, if we change that to say "v1/dataSource" then we'll just get a blank page


public static void Main(string[] args)
{
var builder = WebApplication.CreateBuilder(args);
var app = builder.Build();

var flatFileLocation = builder.Configuration.GetValue<string>("flatFileLocation");

app.MapGet("/v1/dataSource", () => flatFileLocation);

app.Run();
}

 
If we navigate to "http://localhost:5050/v1/dataSource" we'll only now see our "Dev" or "Local" response based on which profile we have loaded. Generally api's have multiple endpoints and it would be nice to be able to not only see them all but be able to test them without having to have navigate to each url. This is exactly what swagger provides, so let's configure it in our Main method.

Before our builder.Build() command add the following two lines of code, 

builder.Services.AddEndpointsApiExplorer();
builder.Services.AddSwaggerGen();

these to lines more or less configure swagger to be able to map all of our endpoints, and generate a swagger UI, however that's not enough we still need to enable it in our project. Most examples show you how to do this in development profile, but we also have our Local profile; after our builder.Build() command add the following.


if (app.Environment.EnvironmentName == "Local" ||
app.Environment.IsDevelopment())
{
app.UseSwagger();
app.UseSwaggerUI();
}


with that done now when we start our application in either "Development" or our custom "Local" profiles swagger will be added to our project. To navigate to your swagger page, simply append the word "Sagger" to the root url of your API "http://localhost:5050/swagger/index.html" and you should see something like the following:


and that's it now, in your "Local" as well as your "Dev" Profiles you can test your api

Saturday, 23 December 2023

Minimal API

When it comes to data access, my preferred approach is to use a dotnet core minimal API; for me this is the ideal middle man between your data and your user interface, I like it because it's simple to set up and simple to understand. Though it doesn't come with all of the complexity of a traditional MVC api. it also doesn't come with all of the extra features of its more 'complex' or 'advanced' (depending on how you look at it) counter part.

That said let's get started, open your terminal and navigate to your desired parent directory.
Execute the following commands:

dotnet new web -o pav.mapi.example --use-program-main

followed by

code pav.mapi.example


The first command says create a web project with the name 'pav.mapi.example' and use the traditional public static main template for the program.cs pag. I do this because I'm old, and it's what I am use to.

The second line just instructs code to open up the pav.mapi.example folder in a new instance of MS Code, if you wanted to open it in the same instance you could throw on the -r option so your command would look like 'Code pav.mapi.example -r' and it would open in the current instance of MS code you have running.


Your app should look something like the above, let's start with the explorer, notice that you have two appsettings files, the way it works is dotnet always loads the 'Appsettings.json' file then it will load when appropriate the corresponding 'Appsettings.<environment>.json' file.

The $10 question is how to I specify which extra app settings file to use; well before we answer that, let's add an 'appsettings.Local.json' file; generally I like to have a version of everthing that I can run in a stand alone fashion, this way I can develop and test things in isolation without the need of an SQL database or a Cloud storage container, or docker. 

In your 'appsettings.Local.json' file add a single entry "flatFileLocation": "Local" and you guessed it in your 'appsettings.Development.json' file add a single entry "flatFileLocation": "Dev", later on we may expand on this, but for now if we can start our application in one of these two modes that will be a win.


Now open up your Program.cs file


namespace pav.mapi.example;

public class Program
{
public static void Main(string[] args)
{
var builder = WebApplication.CreateBuilder(args);
var app = builder.Build();

app.MapGet("/", () => "Hello World!");

app.Run();
}
}

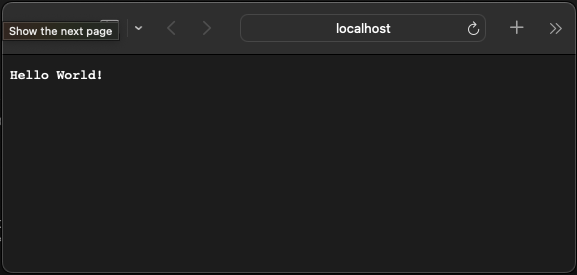
this is why I prefer the Minimal API project, because that's all there is to it, if we run our application now with "dotnet run" we'll see the following in our browser.


Let's try to swap that with our Appsettings flatFileLocation value, modify your Program.cs code to the following

namespace pav.mapi.example;

public class Program
{
public static void Main(string[] args)
{
var builder = WebApplication.CreateBuilder(args);
var app = builder.Build();
var flatFileLocation = builder.Configuration.GetValue<string>("flatFileLocation");
app.MapGet("/", () => flatFileLocation);

app.Run();
}
}

Notice that we added a 'FlatFileLockaiton' variable and assign it our value from our appsettings file, with this change if we stop our project with 'cntrl+c' and run it again with 'dotnet run', then reload our browser we'll get the following.


Which is pretty good we are reading from our 'appsettings' file, that's fine and dandy, but how do we specify the file we want to load, well for that we need to open our properties folder, and take a look at our 'launchSettings.json' file

{
"iisSettings": {
"windowsAuthentication": false,
"anonymousAuthentication": true,
"iisExpress": {
"applicationUrl": "http://localhost:1286",
"sslPort": 44327
}
},
"profiles": {
"http": {
"commandName": "Project",
"dotnetRunMessages": true,
"launchBrowser": true,
"applicationUrl": "http://localhost:5019",
"environmentVariables": {
"ASPNETCORE_ENVIRONMENT": "Development"
}
},
"https": {
"commandName": "Project",
"dotnetRunMessages": true,
"launchBrowser": true,
"applicationUrl": "https://localhost:7177;http://localhost:5019",
"environmentVariables": {
"ASPNETCORE_ENVIRONMENT": "Development"
}
},
"IIS Express": {
"commandName": "IISExpress",
"launchBrowser": true,
"environmentVariables": {
"ASPNETCORE_ENVIRONMENT": "Development"
}
}
}
}

take a closer look at the profiles sections, notice that under the environment variables we have an entry "ASPNETCORE_ENVIROMENT": "Development", now we could very well switch "Development" to "Local" and run our application that way 

{
"iisSettings": {
"windowsAuthentication": false,
"anonymousAuthentication": true,
"iisExpress": {
"applicationUrl": "http://localhost:1286",
"sslPort": 44327
}
},
"profiles": {
"http": {
"commandName": "Project",
"dotnetRunMessages": true,
"launchBrowser": true,
"applicationUrl": "http://localhost:5019",
"environmentVariables": {
"ASPNETCORE_ENVIRONMENT": "Local" // Take a look here
}
},
"https": {
"commandName": "Project",
"dotnetRunMessages": true,
"launchBrowser": true,
"applicationUrl": "https://localhost:7177;http://localhost:5019",
"environmentVariables": {
"ASPNETCORE_ENVIRONMENT": "Development"
}
},
"IIS Express": {
"commandName": "IISExpress",
"launchBrowser": true,
"environmentVariables": {
"ASPNETCORE_ENVIRONMENT": "Development"
}
}
}
}


though better than having two versions of our application, not exactly the ideal solution, so let's add a profile specifically for our "Local" environment.

{
"iisSettings": {
"windowsAuthentication": false,
"anonymousAuthentication": true,
"iisExpress": {
"applicationUrl": "http://localhost:1286",
"sslPort": 44327
}
},
"profiles": {
"http": {
"commandName": "Project",
"dotnetRunMessages": true,
"launchBrowser": true,
"applicationUrl": "http://localhost:5020",
"environmentVariables": {
"ASPNETCORE_ENVIRONMENT": "Development"
}
},
"batman": {
"commandName": "Project",
"dotnetRunMessages": true,
"launchBrowser": true,
"applicationUrl": "http://localhost:5050",
"environmentVariables": {
"ASPNETCORE_ENVIRONMENT": "Local"
}
},
"https": {
"commandName": "Project",
"dotnetRunMessages": true,
"launchBrowser": true,
"applicationUrl": "https://localhost:7177;http://localhost:5019",
"environmentVariables": {
"ASPNETCORE_ENVIRONMENT": "Development"
}
},
"IIS Express": {
"commandName": "IISExpress",
"launchBrowser": true,
"environmentVariables": {
"ASPNETCORE_ENVIRONMENT": "Development"
}
}
}
}


I named the local launch settings profile batman on purpose, this is because I want to drive home that you are specifying the profile via the launch settings, which in turn choose the appsettings, not the other way around. I placed my custom environment second to drive home the fact that by default when you 'dotnet run', it's the first profile that is loaded if not specified. if you where to execute 'dotnet run', the browser would return "dev"

Now finally for the big reveal, if you want to specify the profile you simple type in 

dotnet run -lp batman -lp stand for load profile

and that's it you now have an app that can be customised based on your appsettings json file. 

One final note, go ahead and replace batman with local, just to remove the silliness from our example