to get started let's create four pages in a views folder in our solution.
With our four page created lets load up some arrows for our android project
Put them in the resources\drawable folder of our android project
with that done, let's configure our four tab pages in our views folder. just open up each one and make the following changes to the xaml.
<?xml
version="1.0" encoding="utf-8" ?>
<ContentPage xmlns="http://xamarin.com/schemas/2014/forms"
xmlns:x="http://schemas.microsoft.com/winfx/2009/xaml"
x:Class="pav.TabbedNavigation.Views.LeftPage"
Title="Left" Icon="arrowLeft.png">
<ContentPage.Content>
<StackLayout>
<Label Text="Looking
left"
VerticalOptions="CenterAndExpand"
HorizontalOptions="CenterAndExpand" />
</StackLayout>
</ContentPage.Content>
</ContentPage>
For each page give them a descriptive title and and icon, if you want you can change the content as well just to be a little more descriptive on each page
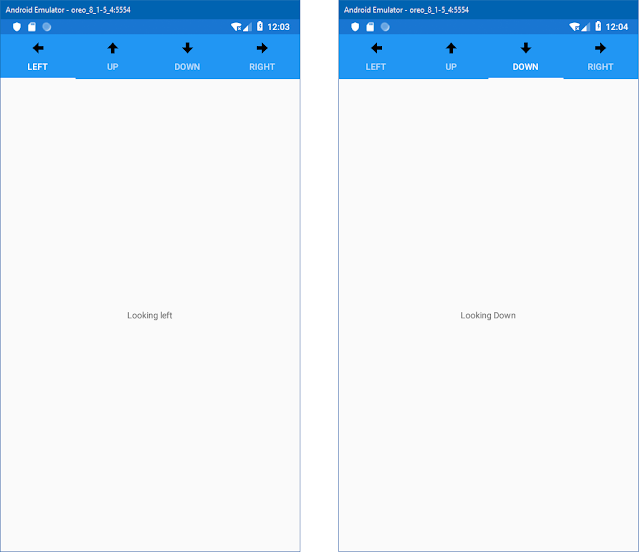
to initialize the tabbed navigation pattern you have to open up your MainPage.xaml and change it's root from content page to tabbed page like so,
<?xml
version="1.0" encoding="utf-8" ?>
<TabbedPage xmlns="http://xamarin.com/schemas/2014/forms"
xmlns:x="http://schemas.microsoft.com/winfx/2009/xaml"
x:Class="pav.TabbedNavigation.MainPage"
/>
using Xamarin.Forms;
using pav.TabbedNavigation.Views;
namespace pav.TabbedNavigation
{
public partial class MainPage : TabbedPage
{
public MainPage()
{
InitializeComponent();
this.Children.Add(new LeftPage());
this.Children.Add(new UpPage());
this.Children.Add(new DownPage());
this.Children.Add(new RightPage());
}
}
}
Android:
Windows:
now if you prefer you can add all of your pages in the Xaml instead of the codebehind, but modifying the Children collection at that point can prove to be rather challenging (if possible).
<?xml
version="1.0" encoding="utf-8" ?>
<TabbedPage xmlns="http://xamarin.com/schemas/2014/forms"
xmlns:x="http://schemas.microsoft.com/winfx/2009/xaml"
x:Class="pav.TabbedNavigation.MainPage"
xmlns:views="clr-namespace:pav.TabbedNavigation.Views"
BackgroundColor="LightSalmon"
BarBackgroundColor="Maroon"
BarTextColor="White">
<TabbedPage.Children>
<views:LeftPage Title="Left" Icon="arrowLeft.png"/>
<views:UpPage Title="Up" Icon="arrowUp.png"/>
<views:DownPage Title="Down" Icon="arrowDown.png"/>
<views:RightPage Title="Right" Icon="arrowRight.png"/>
</TabbedPage.Children>
</TabbedPage>
<?xml
version="1.0" encoding="utf-8" ?>
<TabbedPage xmlns="http://xamarin.com/schemas/2014/forms"
xmlns:x="http://schemas.microsoft.com/winfx/2009/xaml"
x:Class="pav.TabbedNavigation.MainPage"
xmlns:views="clr-namespace:pav.TabbedNavigation.Views"
BackgroundColor="LightSalmon"
BarBackgroundColor="Maroon"
xmlns:android="clr-namespace:Xamarin.Forms.PlatformConfiguration.AndroidSpecific;assembly=Xamarin.Forms.Core"
android:TabbedPage.ToolbarPlacement="Bottom"
BarTextColor="White">
<TabbedPage.Children>
<views:LeftPage Title="Left" Icon="arrowLeft.png"/>
<views:UpPage Title="Up" Icon="arrowUp.png"/>
<views:DownPage Title="Down" Icon="arrowDown.png"/>
<views:RightPage Title="Right" Icon="arrowRight.png"/>
</TabbedPage.Children>
</TabbedPage>


