Saturday, 1 October 2022

CICD pipeline for Azure Blob storage with CDN - Part 1 Initiate your Repo

Let's say that you have a web app which contains lots of hi-res Hero images, now you probably started by bundling these images in some sort of assets folder. Now that you're site is live you may have noticed that everytime someone hits your site they have to download all these images, and the further they are from your server's physical location the more brutal the performance is. We'll you're in luck buttercup, fasten your seatbelts and let's do this. We are going to create CDN for your assets.

Let's start with creating folder with our assets, and hook it up to a git repo in azure devops.

to get started open up your command line and create a directory called pav-content-cdn, then initiate a git repo, and finally connect it to your azure deveops repo.

follow the following:
  1. Open your command terminal.
  2. Create a directory: mkdir pav-content-cdn
  3. Navigate into that directory: cd pav-content-cdn
  4. Initialize a git repo: git init
  5. Open your project in code: code .

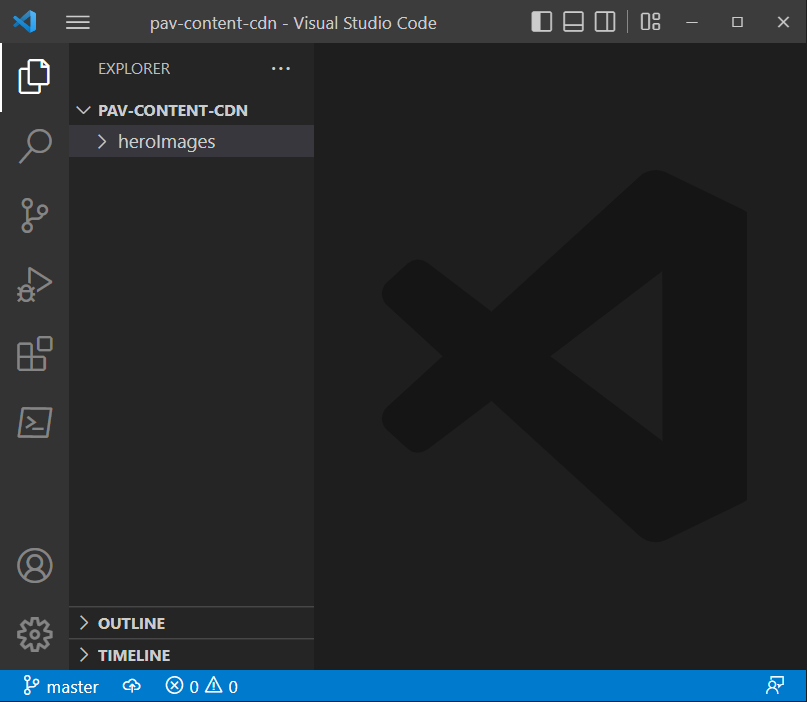
Your code project should look something like the following.


Nothing special, just a very simple one folder structure, with nothing in it, next go to 


and download some hi-res images into your heroImages folder, you should have something like the following.


Very simple, just a few images added to a heroImages folder.

At the root of your project add a PowerShell Script called AzureInfrastructure.ps1, just leave it blank for now, in a future post we are going to create a powershell scrip that is going to provision all of our azure cloud resources to host our hero images.


Next step is to create a project in azure devops Azure DevOps Services | Microsoft Azure

If you don't have an account, you'll need to make one, With our Azure devops portal open click the "New Project" in the upper right corner


Next you'll see the "Create new project" modal, fill in your details, and under advanced select Git version control and it doesn't really matter what you choose for "Work item process", however unlike me, don't put two .. next to each other in your project name.


Once you click the "Create" button it should take a minute or so to set up your project environment. 

With your project set up, let's configure a cloud repo for your project.


With the repo initialized take note of the second set of commands, the ones that lets you push your repo up to your Devops site.


In either your Windows terminal or right within code we are going to commit your code and push it to your repo, follow these steps
  1. Add all of your code to your branch: git add .
  2. Commit your your branch with a comment: git commit -m 'initi project'
  3. Set your project origin to your Devops repo: git remote add origin https://PawelCiucias@dev.azure.com/PawelCiucias/pav.content.cdn/_git/pav.content.cdn
  4. Push your project: git push -u origin --all
your terminal should look like the following.


I've put in green arrows for all of the commands you have to input. just and FYI at some point your azure devops environment, may ask for you to authenticate before pushing.

One final check that you can do is go to your repos in your devops Portal and confirm that your code has in fact been pushed to your online repo, click the orange button on your devops portal


You should see your source code pushed to your Azure devops online repository.


That's it for part 1, we created a local project, initialized git and pushed it up to Azure devops.

Thursday, 1 September 2022

Az Powershell on a M1 Mac

So you've done it, you bought yourself a brand new M1 Mac and now you've realised you've never used one before, and by you I mean me... 

So let's get started, firstly you need to Homebrew 

now that you have homebrew installed, it's time to install Powershell

brew install --cask powershell

when new versions of powershell are released you can update with

brew update
brew upgrade powershell --cask

Now that we have powershell installed, next let's install our Azure az module to be able to script some azure tasks.

pretty straight forward, I don't see why I would rewrite good content, sometimes just finding the right documentation is a slog. 


Wednesday, 24 August 2022

Automapper

The Automapper is a great utility that will easily facilitate the conversion of models to other models without needing to  define that logic inside the models themselves. It's a simple Nuget package that allows you to create "Profiles" which more or less define rules on how to convert one Type of object to another, so for example if you had an HourlyEmployee class and you wanted to convert it to a SalaryEmployee Class.

More often than not the auto mapper is actually used to generate Data Transfer Objects (DTOs) for APIs, DTOs are generally a manipulation of a model either to provide consumers of the API a subset and/or a manipulation of a model.

To demonstrate the auto mapper we are going to build a very simple Console Application.

To Get started let's set up our Console application

  1. mkdir pav.automapper.cnl  create a directory for your project
  2. cd pav.automapper.cnl navigate into that directory
  3. dotnet new console --use-program-main insatiate a console application 
  4. code . open the folder in MS code
You're MS Code should open with your current working directory open, if you are prompted to trust yourself, go ahead and do that.


with your project trusted, before we get started ensure that you have the C# extension from Microsoft installed.


On the left panel click the Extensions button and make sure that you have the C# extension added, once you are sure that you have it, click on the explorer button and open you project file, it's the one that ends in .csproj


with that open we are now going to add a nuget package for automapper 
https://www.nuget.org/packages/automapper/
if you are looking to add this to an API then rather than install just automapper, install the Microsoft dependency injection variant of it

for now let's add the basic automapper nuget with 

dotnet add package automapper


with our package added notice that our project file now makes a reference to it


next let's run our our project with "dotnet run" 


exactly what we would expect to see, simply "Hello World!" written out to our console. let's open up our program.cs file and see what we are starting with.


not much there, and to be honest if we didn't include our "-use-program-main" flag when we created our application it would be even less, it would look something like:


which to me is just confusing, but that's probably cause I'm old now, by software standards I should have died of a stroke years ago.

To get start we are going to need some models, were going to keep it pretty simple and create a
simple Employee class and a corresponding salaryEmployee and hourlyEmployee class definitions which inherit from an Abstract Employee, then after we are going to use automapper to convert between the two.

so first lets get started by setting up our models folder, with our three classes defined


Now whenever I make an abstract class I like to prefix it with the word Base, just to give me a visual que that it's an abstract class and that any other class with the word employee in it will derive from that base class, it's just a personal preference, you can name them whatever you like.

lets start by defining our Base Employee class, one thing to remember is that all of our classes that we will be converting to, require a parameterless constructor, so that auto mapper can instantiate them.

using System;

namespace pav.automapper.cnl.Models{
    public abstract class BaseEmployee{
        public string? FirstName { get; set; }
        public string? LastName { get; set; }
        public DateTime Birthdate { get; set; }

        public BaseEmployee(){}
        public BaseEmployee(string firstName, string lastName, DateTime birtdate){
            this.FirstName = firstName;
            this.LastName = lastName;
            this.Birthdate = birtdate;
        }

        public abstract float payMoney();

        public int getAge()
        {
            var today = DateTime.Today;
            var age = today.Year - Birthdate.Year;
            if (Birthdate.Date > today.AddYears(-age))
                return age-1;

            return age;
        }

        public override string ToString()
        {
            var fn = this.FirstName;
            var ln = this.LastName;
            var age = this.getAge();
            return $"{fn} {ln} is {age} years old";
        }
    }
}

Pretty simple class definition we overrode the ToString() method to make it easier for us to later output to our console and we create an abstract payMoney function which will be used to calculate our employees wages.

Next let's define the hourlyEmployee class.

using System;

namespace pav.automapper.cnl.Models{
    public class HourlyEmployee : BaseEmployee{
        public float Wage { get; set; }
        public float Hours { get; set; }

        public HourlyEmployee(){}
        public HourlyEmployee(string firstName, string lastName, DateTime birthdate, float wage, float hours)
            :base(firstName, lastName, birthdate){
                this.Wage = wage;
                this.Hours = hours;
        }

        public override float payMoney(){
            return Hours * Wage;
        }

        public override string ToString()
        {
            var baseString = base.ToString();
            return $"{baseString} and will be paid ${payMoney()}";
        }
    }
}

again no rocket science here, we implemented to payMoney function as well as overrode the ToString method.

One more Model to go and that's the SaleryEmployee one.

using System;

namespace pav.automapper.cnl.Models{
    public class SalaryEmployee : BaseEmployee{
        public float Salary { get; set; }
       
        public SalaryEmployee(){}
        public SalaryEmployee(string firstName, string lastName, DateTime birthdate, float salary)
            :base(firstName, lastName, birthdate){
                this.Salary = salary;      
        }
       
        public override float payMoney(){
            return Salary;
        }

        public override string ToString()
        {
            var baseString = base.ToString();

            return $"{baseString} and has a salary of ${payMoney()}";
        }
    }
}

More or less the same as before if not simpler since we removed the hour and wage and just provide a base salary, we also updated the two String method to make it easier to distinguish between the two types of employees.

let's go to our Program.cs class and test our our models.

using pav.automapper.cnl.Models;
using System;

namespace pav.automapper.cnl
{
    class Program
    {
        static void Main(string[] args)
        {
            var john = new HourlyEmployee("John", "Doe", new DateTime(1984, 1, 31), 10, 40);
            Console.WriteLine(john);

            var bob = new SalaryEmployee("Bob", "Smith", new DateTime(1984, 1, 31), 600);
            Console.WriteLine(bob);
        }
    }
}

we instantiated two different employees john and bob then we write them out to the console, 


exactly what we would expect to see.

We can finally bring in automapper, let's say that we wanted to convert an hourly employee to a salaried one, well we could manually do it, but automapper will let us define mapping rules and do it for us. 

let's get started by creating a Profiles folder and adding an EmployeeProfile class.

We included a base implementation for the EmployeeProfile class and inherited from the Profile class which is included in the AutoMapper nuget.

Let's now define some mapping rules to convert an hourly employee to a salaried one

CreateMap<HourlyEmployee, SalaryEmployee>()
    .ForMember(dest => dest.Salary, opt => opt.MapFrom(src => src.Hours * src.Wage));

it's that simple, we map our destination property to what we want it to be from our source class. the finished EmployeeProfile class should look something like 

using AutoMapper;
using pav.automapper.cnl.Models;
namespace pav.automapper.cnl.Profiles
{
    public class EmployeeProfile : Profile
    {
        public EmployeeProfile()
        {
            CreateMap<HourlyEmployee, SalaryEmployee>()
                .ForMember(dest => dest.Salary, opt => opt.MapFrom(src => src.Hours * src.Wage));
        }
    }
}

Obviously we have to somehow call this, but the conversion logic is done.

let's go back to our Program.cs class and implement our mapper. Let's tart by configuring our automapper.

var config = new MapperConfiguration(cfg => cfg.AddProfiles(new[] { new EmployeeProfile() }));
var mapper = new Mapper(config);

with that done we can now easily convert hourly employees to salaried ones

using AutoMapper;
using pav.automapper.cnl.Models;
using pav.automapper.cnl.Profiles;
using System;

namespace pav.automapper.cnl
{
    class Program
    {
        static void Main(string[] args)
        {
            var config = new MapperConfiguration(cfg => cfg.AddProfiles(new[] { new EmployeeProfile() }));
            var mapper = new Mapper(config);

            var john = new HourlyEmployee("John", "Doe", new DateTime(1984, 1, 31), 10, 40);
            Console.WriteLine(john);

            var bob = new SalaryEmployee("Bob", "Smith", new DateTime(1984, 1, 31), 600);
            Console.WriteLine(bob);

            var John = mapper.Map<SalaryEmployee>(john);
            Console.WriteLine(John);
        }
    }
}

it's just that easy now, we simply run john through our mapper and specify the output class and the rules we defined in our profile will take care of the conversion, any properties that have the same name will be automatically mapped.

Obviously there is a lot more to this, but at it's core that's all the automapper is for, to convert one class and abstract away the mappings for this conversion from the actual classes being converted.

Sunday, 30 January 2022

local mock data for SPA web service

Whenever I build SPA's in vue I use a poor mans IOC pattern, which in principle accomplishes leveraging a mock version of my service that instead of fetching data from a web api leverages local json files, however in practice it has very little to do with Inversion of control, though it could adhere to IOC principles I find my pragmatic approach less hassle. 

I start with creating env files: moq, dev, prod

.env.dev

VUE_APP_ENV=dev
VUE_APP_HEADER_COLOR=#9F1F36

.env.moq

VUE_APP_ENV=moq
VUE_APP_HEADER_COLOR=#FFD200

.env.prod

VUE_APP_ENV=prod
VUE_APP_HEADER_COLOR=

as you can see I also like to add a a color code so that i can easily tell which environment I am currently working on.

next I create a services folder where I keep all my logic that communicates outside my app and a mock_data folder where I keep json files that will represent the responses that I would get from my backend api.


so let's create a simple json file for our mock data, here i have created a openings.json file that contains three chess openings

[
  {
    "description""Sacrifice a pawn for a head start",
    "id""55d86e6f-b043-4544-ae6b-b88ee4ee134b",
    "name""King's gambit",
    "tags": ["kingsPawn""gambit"]
  },
  {
    "description""trade a pawn for central occupation",
    "id""52366eb7-fcad-4b58-9ad3-f73c1585c16a",
    "name""Queens's gambit",
    "tags": ["queensPawn""gambit"]
  },
  {
    "description""Win by oversight",
    "id""e5f7f895-073c-4a24-9df0-d9d65b6ad46a",
    "name""Scholar's mate",
    "tags": ["kingsPawn""dubious"]
  }
]

this would be the payload i would expect from some web api get openings, but for now we will just use local mock data.

**in your tsconfig.json and make sure to add "resolveJsonModule": true to the compilerOptions

next create a openingsService.ts file in which you should define an interface and two services a private mock service and a default prod/dev service. however rather than creating a context and pass that into the service service what i do is use the object.assign function to override my dev/prod services with a mock counter part.

import { IOpening } from "@/models/opening";

export interface IOpeningService {
  getOpeningsAsync: () => Promise<IOpening[]>
}

class MoqOpeningService implements IOpeningService {
  getOpeningsAsync: () => Promise<IOpening[]> = 
    async () => {
      return require<IOpening[]>("@/mock_data/openings.json");
    };
}

export default class OpeningService implements IOpeningService {
  constructor() {
    if(process.env.VUE_APP_ENV === "moq")
      Object.assign(thisnew MoqOpeningService());
  }

  getOpeningsAsync: () => Promise<IOpening[]> = 
    async () => {
      throw new Error("getOpeningsAsync not implemented");
    }
}

notice that in the constructor of the default class there is a check of which environment is running and if it is the "moq" version a new instance of the MoqOpeningService is assigned to the current opening service overriding everything defined in the interface. 

now that is fine and dandy however we have one final caveat, all of your mock data is going to be packaged in your dist folder when you build your project.

To exclude mock files from your build 

firstly you have to add a reference to the webpack npm package 

i used the 4.45.0 version because I was getting exceptions with the latest major 5+ version

npm install webpack@^4.45.0 --save-dev

with webpack install if you haven't already created a vue.config.js file go a head and do that at the root of your project, refer to the project structure screen capture at the start of this post.

//vue.config.js

// eslint-disable-next-line @typescript-eslint/no-var-requires
const webpack = require('webpack')

module.exports = {  
  configureWebpack: {
    plugins: process.env.VUE_APP_ENV == "prod" ? [
      new webpack.IgnorePlugin({
        resourceRegExp: /mock_data\/.*\.json$/,
        contextRegExp: /services$/
      })
    ] : []
  }
}

IgnorePlugin | webpack

now when you build your project your mock data will not be included in your dist folder.


Monday, 24 January 2022

Vue.js 3 include webconfig in build

So you pushed your SPA build with Vue.js to Azure and if you refresh anything deeper than your index page you are getting a "resource not available" or something along those lines. 

well my dear friend you need to include a webconfig file in your build, now the problem is that if you include a webconfig in your project that file is ignored in your build. 

before we tackle that problem, let's start with the actual web config.

<?xml version="1.0" encoding="UTF-8"?>
<configuration>
<system.webServer>
    <rewrite>
      <rules>
        <rule name="Main Rule" stopProcessing="true">
                <match url=".*" />
                <conditions logicalGrouping="MatchAll">
                    <add input="{REQUEST_FILENAME}" matchType="IsFile" negate="true" />
                    <add input="{REQUEST_FILENAME}" matchType="IsDirectory" negate="true" />
                </conditions>
                <action type="Rewrite" url="/" />
            </rule>
        </rules>
    </rewrite>
</system.webServer>
</configuration>

Create a file in your project somewhere and call it web.config

Now let's focus on copying it over to your build result.

to pull this off you will need to install the copy webpack plugin

    "copy-webpack-plugin": "^6.4.1",

ensure that it's version 6.x or at least at the time of this blog post

npm install copy-webpack-plugin@6 --save-dev

next open your vue.config.js file and use your webpack copy plugin to copy your webconfig to your dist folder.

// eslint-disable-next-line @typescript-eslint/no-var-requires
const webpack = require('webpack');
// eslint-disable-next-line @typescript-eslint/no-var-requires
const CopyPlugin = require('copy-webpack-plugin');
// eslint-disable-next-line @typescript-eslint/no-var-requires
const path = require('path');

module.exports = {  
  chainWebpack: config => {
    config
    .plugin('html')
    .tap(args => {
      args[0].title = 'My app name'
      return args
    })
   
   
  },
  configureWebpack: {
    plugins: [
      new CopyPlugin({
        patterns: [
          {
            from: path.resolve(__dirname, "src", "web.config"),
            to: path.resolve(__dirname, "dist",),
          }
        ]
      })
    ]
  }
}

and voila, npm run build and you should see your web.config file in your dist folder.