Continuing from where we left off in our last post, we had a very simple 'Plane' game object and a 'Player' game object that could move around our plane. Now let's create some obstacles for our 'Player' game object to circumnavigate.
But before we get started let's increase the size of our plane, try doubling it for now
All I did was increase the X and Z scale to 2, doubling our planes Surface area, you may also notice that I've shrunk our sphere to 0.5; In way quadrupling our surface area (don't quote me on the math there).
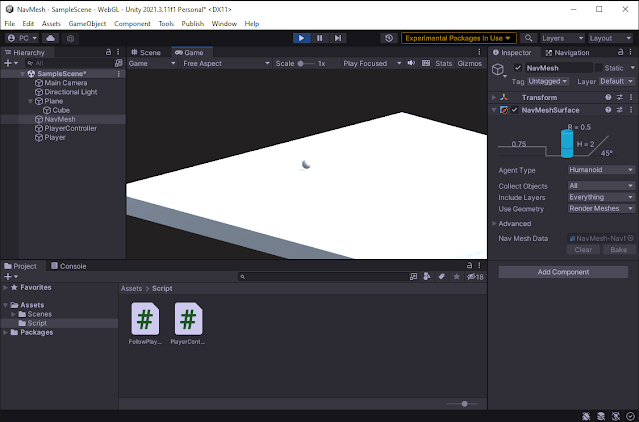
Let's give our plane some girth, add a cube as a sub object of the plane, make it roughly the same size or even a little bigger and position it directly underneath our plane.
I've selected the plane to highlight the borders.
Now let's create a 'FollowPlayer.cs' Script in our Scripts folder, this will move our camera with our 'Player' Game Object.
using UnityEngine;
public class FollowPlayer : MonoBehaviour
{
//reference to the player game object
public GameObject Player;
//reference to camera Z start point
private float cameraZ;
void Start(){
// save the cameras initial Z point
this.cameraZ = this.transform.position.z;
}
void LateUpdate()
{
var x = this.transform.position.x;
var y = this.transform.position.y;
//Maintain consistent z distance between Camera & Player
var z = Player.transform.position.z + cameraZ;
//update camera position.
var newCameraPos = new Vector3(x, y, z);
this.transform.position = newCameraPos;
//rotate camera to look at the player
this.transform.LookAt(Player.transform);
}
}
Once your script is complete we're going to add it to our 'Main Camera' game object.
Next add a reference to our 'Player' game object inside our 'Follow Player' script. With our Script attached to our 'Main Camera' open the Camera component and change the 'Clear Flags' property to solid color and set that color to black or an off black color.
Let's bake our our NavMesh again to update it with our new size change, Select the 'NavMesh' Game Object from our Hierarchy and in the Inspector click the 'Bake' button.
Now hit play and try out our little game, it should look something like this.
now let's build some obstacles, create an empty Game Object and call it obstacles, we're just doing this to group our GameObjects in our Hierarchy so that it doesn't get too cluttered.
I created four cubes and scaled them to different sizes and placed them around the plane, now there positioning isn't too important just that there's enough room for our ball to move between them.
You may have noticed that white on white white is proving to be pretty difficult to keep track of, let's add some colour to our world, let's create a new folder called Materials and add a material called 'DarkGreen'
Select Your new 'DarkGreen' Material and set its color to hot pink, no wait I mean dark green, just like you did for the Camera background earlier.
with that complete, create colours for obstacles, player and the plane base, we'll use dark green for our Plane.
with all of our colours defined, you can either drag and drop the materials onto the Objects you want them to be applied to. Now if you click play again after you've applied all your materials you should see something like the following.
Great except for the part where our Player is moving through obstacles, but let's fix that, exit play mode and select our 'NavMesh' GameObject in our Hierarchy and again click the 'Bake' button.
Let's play our game again.
better than last time, at least our player isn't moving through our obstacles, but it's still not going around them. We have basically three options to force our player to move around our Obstacles.
- Add a 'NavMeshModifier' to our obstacles and flag them as not walkable.
- Increase the Obstacles height so that the Agent can't get over it
- Decrease the Agents ability to go over obstacles
Firstly you can create a NavMeshModifier component and override the area as not walkable, to demo this click on the 'Obstacles' game object and add the 'NavMeshModifier' component.
check off the "Override Area' and select 'Not walkable', back once more and now your 'Player' should have to circumvent the obstacles as it moves to a specific position. Before we continue make sure to remove the NavMeshModifier component from our Obstacles.
The Second method the simpler in conception, select the 'NavMesh' game object and take note of the step height of our agent, once you do that just pick an obstacle and increase it's height to a value greater than the step height.
In the Third approach rather than increasing the size of the obstacle we instead decrease the agent's step value, to accomplish this we click on the Navigation panel, select the agent tab and decrease the step height to .2 and set the 'Max Slope' to 35
then select the 'NavMesh' gameObject' in our Hierarchy make sure that you select the inspector again and click the bake button once more.
You can see that our new nav mesh forces our Player to move around our obstacles, however it allows our player to walk ontop of our thick obstacle if it can get up there.
That is enough for this post,


